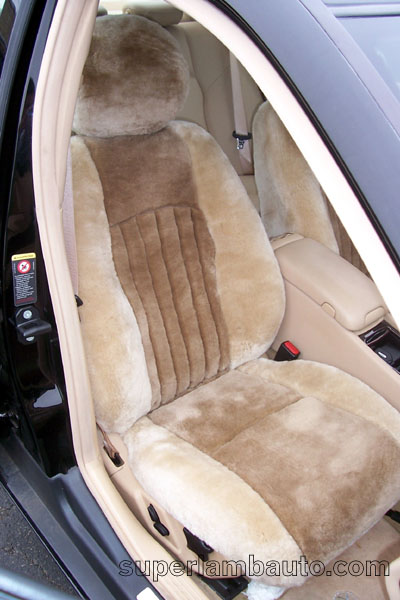
Seat Type 1 Installation Photos!
We had a
Mercedes E320 in here last week that we took photos of during the installation (if you've not seen the general installation instructions already, they can be found
here). This Mercedes seat is a pretty typical seat so it's a great example and a great opportunity for us to expand on our general installation instructions. We'll show more challenging installs as they come up here on the blog.
So moving on to the details, I found the headrest on this one to be a bit of a challenge to get off. Had to use a straightened out paperclip to press the release button and get that thing off :

The next steps, getting the top over the back rest and pushing the hooks through the crack in the seat, were a breeze.


Finding a good place to attach the hooks can be a challenge too (the
Lincoln Navigator we had in about a month ago seemed easy enough, as it is high up off the ground, but no!). Here's what it looks like from the back seat. Just pull them from the front underneath the seat and find a good spot:

After the bottom hooks are in place, then the side hooks are connected:


Once the hooks were in place, the bottom part can be put into place easily:


Using an installation rod, the last hook is threaded through and pulled out to the back and connected to its mate from the other side.


The material on the sides is tucked into the plastic molding:

And finally the last step, making the holes for the headrest to be reinserted. now that everything is in place, I poked my hand underneath the cover to located the opening to insert the headrest. we recommend making a 'V' shape with your fingers under the seat cover and then using a sharp object like a razor with the other hand to poke a small hole in the cover. A small amount of wool will shed where it is cut. Of course this was repeated for both headrest holes. The sheepskin is then tucked underneath the plastic molding.


Wa-La! the headrest is replaced and I was done. Total time was about 15 minutes.


Hope that helps out! Next entry will be how I put on the headrest cover. Fun with VELCRO!!
Victor